Tuesday 16 December 2014

USB Remote v1.21

Here's what's new in latest update:


Auto connect:

When enabled (Settings -> Auto connect), application will automatically try to connect when launched or resumed. Auto connect won't be triggered when connection is lost while using the app.


Fixed mousepad bug:

Accidental clicks that appeared when using mousepad (fast finger movements) are now eliminated.


New mouse macro actions:

To make manual macro editing simpler, I've introduced following macro actions:
  • <click>button, clicks, example: <click>left, 2
  • <move>x,y, example: <move>10, -15
  • <scroll>z, example: <scroll>5


Text editor shortcut:

If macro is stored as a text file, it can be now easily opened in text editor:


"Pause" macro action:

When "pause" action is used, macro execution will be paused until "Yes" button is clicked. This can be useful when you need to wait for some time consuming operation (like starting an application or opening a file on USB host) to finish before proceeding with macro execution.

When recording a macro, use "Timer"icon to add "pause" action.


Autoexec macro:

If /USBRemote/Macros/autoexec.txt macro file is present it can be automatically executed as soon as connection is established. Useful for time critical situations, like entering BIOS before OS starts to boot. Checkbox "Run autoexec macro?" must be checked (each time) before connection is established. The checkbox won't be visible if autoexec.txt is not present.

Note: "pause" macro actions will be ignored in this case.


Thursday 11 December 2014

USB Remote v1.20

I've just uploaded v1.20 to Google Play. Here's what's new:


InputStick (Type):

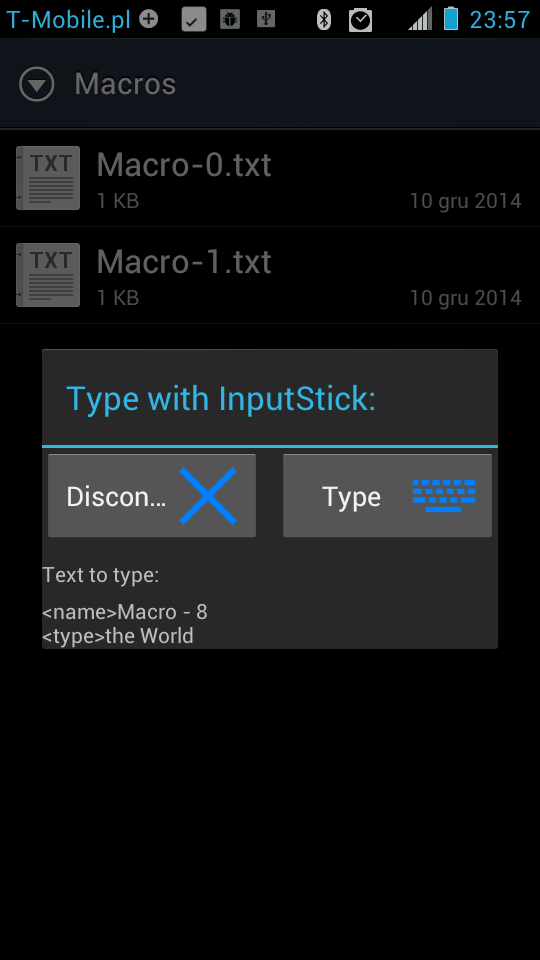
Now you can use InputStick to type: text files, phone numbers, URLs, email addresses etc (anything text/plain for SEND and VIEW actions).


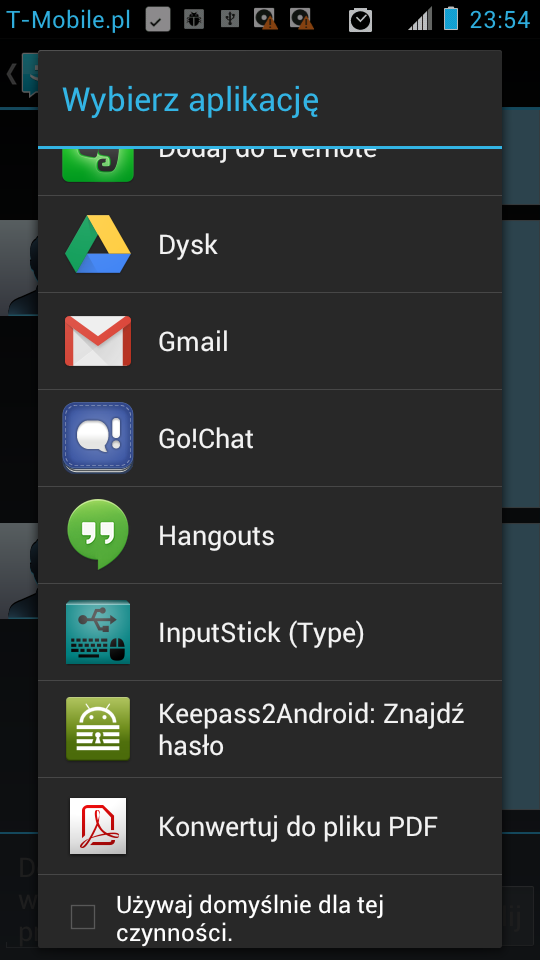
This is definitely useful when your bank sends authentication codes via SMS: just long press on received code, choose share option and select "InputStick (type)":


If you don't want "InputStick (type)" to appear on list of available actions, it can be disabled in settings. There are also some other things that can be adjusted:
  • Auto connect - if InputStick is not connected,application will automatically try to establish connection.
  • Auto type - will start typing text automatically. Be careful with this!
  • Auto close - activity will close itself as soon as it is done with typing text.


Export macros:

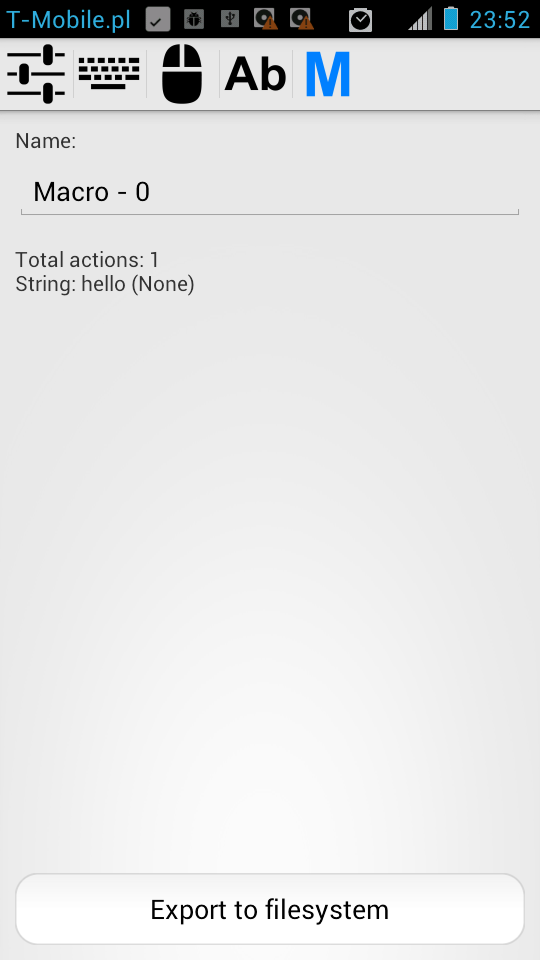
Macros can be now exported to .txt files in /USBRemote/Macros/ location. You can edit such macro file using any text editor (on your phone or on PC). You can also send such files to some other device.
Note: after editing such file, it has to be imported into internal database (or you can entirely switch to use file system for storing macros, more details later).


Import macros:

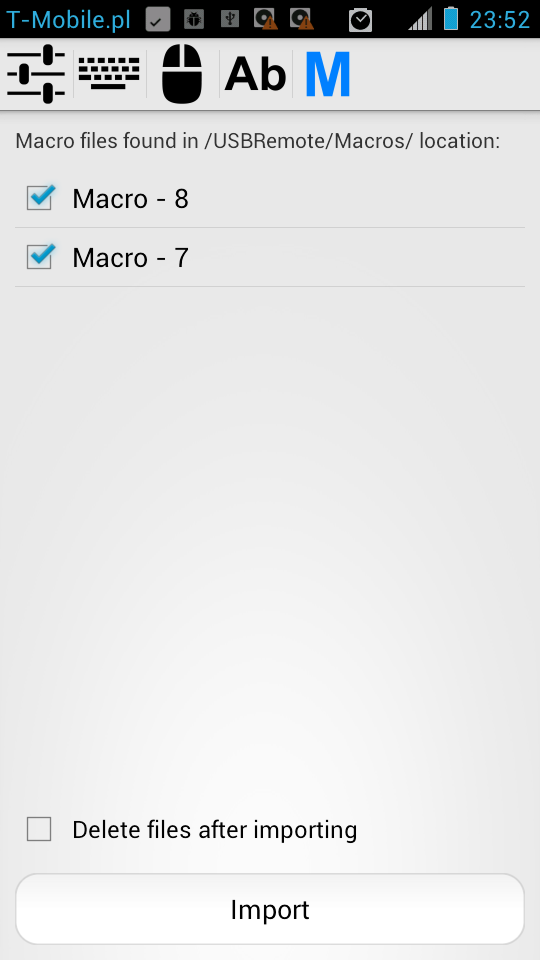
Macros from /USBRemote/Macros/ directory can be imported into internal macro database. 


File system storage:

You can also set /USBRemote/Macros/ directory as a default storage location for macros. In Settings screen, click on Macro storage and choose: File system (.txt files).

In such case internal database won't be used. You'll probably want to export your macros before switching to this option. Now it is no longer necessary to do anything after editing such macro, it will be loaded from file before executing.


Macro file format:

Here's an example of macro file (I'll cover this in more details in a separate post):

#begin of file (demo.txt)
#just a comment line

#display name for the macro:
<name>DemoMacro

#type text, *only single line*
<type>hello
#press key, use standard US key labels
<press>enter
<type>world

#delay in ms
<delay>500

#press key combination:
<press>ctrl+s
<d>3000
<press>esc

#wait until all interface buffers are empty
#in this case: make sure that "Ecs" was received by USB host, before executing any mouse

action
<sync>

#mouse click: button (left, right, middle), how many times
<click>right 1
#move mouse left & down:
<mouse>0, -20, 10, 0
#scroll up:
<mouse>0, 0, 0, 5
#press left button (and hold)
<mouse>1, 0, 0, 0
<delay>3000
#release:
<mouse>0, 0, 0, 0


#consumer control actions: volup, voldown, mute, prev, next, play, stop
<consumer>mute
<delay>3000
#unmute:
<consumer>mute
#end of file


Other changes:

There are also some UI changes. Last but not least, new line and tab characters are now supported when typing text.

Tuesday 25 November 2014

Protocol documentation

InputStick protocol documentation is finally available for download. "Security" chapter will be added sometime in December.

Sunday 23 November 2014

USB Remote v1.14

New features introduced in 1.14 version:
  • Danish keyboard layout.
  • Screen orientation can now be locked in portrait, landscape mode or set to auto (default).
Most new changes are related to "Text" tab:
  • "Type automatically" option - after completing Scan, Speech or Copy from clipboard action, text will be automatically typed.
  • "Auto enter" - Enter key will be pressed after each typing action.
  • "Continuous scanning mode" - after completing QR/barcode scanning action, text will be immediately typed and next scan will be automatically launched. This will repeat until user uses "Back" action to return from scanning. This option will make scanning a lot of QR/barcodes way faster than before. Also, locking screen in landscape mode will prevent from constant orientation changes.

Wednesday 15 October 2014

USB Remote v1.13

  • Added: United Kingdom, Finnish, Hebrew, German (Mac), Italian, Swiss (DE & FR) keyboard layouts - it turns out that for some languages, Mac computers use slightly different keyboard layout. Note about Hebrew and Swiss (DE) layouts: SGCap mechanism is not yet supported, some characters won't be available.
  • Added "function" ("Fn") keys screen - can be accessed from both custom and system keyboard screens. 
  • Fixed performance issue (custom keyboard) - due to a bug, screen was refreshed 20 times a second, instead of only when necessary. This caused performance problems on slower devices.
  • Added non-US backslash key (custom keyboard, depends on selected layout) - this key will only appear when it is present in currently selected keyboard layout.
  • Fixed special characters problem for some non-US layouts (system keyboard) - sometimes US layout was used instead of currently selected layout.


Additional key "non-US backslash" will now appear in some keyboard layouts (like German). Use "Fn" button to access function keys activity.

Function keys activity.

Thursday 2 October 2014

USB Remote v1.12

Update will be available via Google Play in a few hours. Here's list of new features and improvements:

  • Added: French, Spanish, Norwegian and Swedish keyboard layouts - this is a result of using latest version of InputStickAPI. At the same time it solved some other problems (more info here).
  • Mousepad can be displayed when system keyboard is used - you must adjust its height manually, depending on your screen resolution and how much space is occupied by your virtual keyboard (make sure that mouse buttons are not covered by the keyboard). Note: some virtual keyboards can block access to other UI elements when in landscape mode. Looks like nothing can be done about this problem.

System keyboard with mousepad enabled.
 

New settings for system keyboard.

UI elements inside red outline are blocked by the virtual keyboard!
  • Auto fullscreen and auto leave fullscreen options - these options will make it a bit easier and faster to use system keyboard in fullscreen mode. If you use system keyboard option (instead of custom keyboard) you should definitely give it a try.
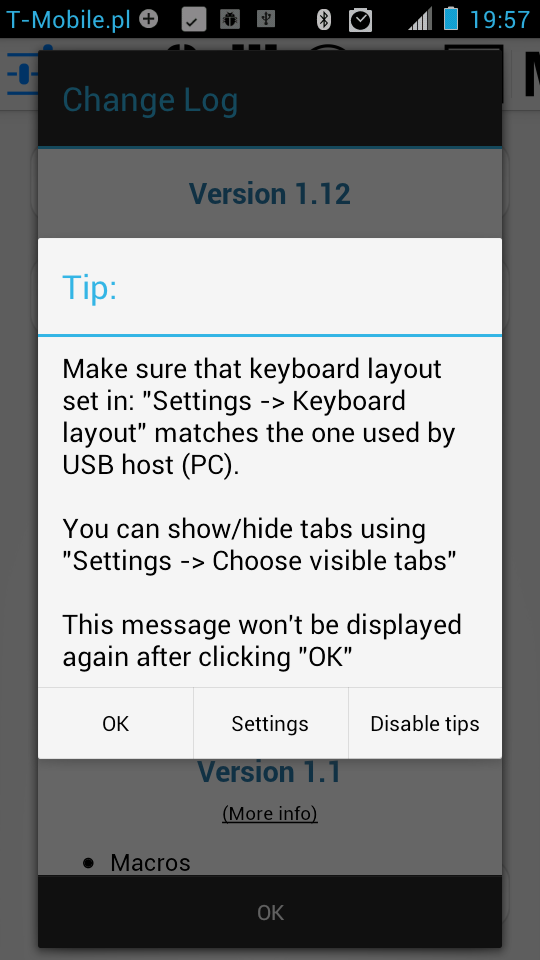
  • Tips messages - brief tips messages will be displayed in various places. Each message will be displayed only once. There is also a button which will immediately disable all tips messages.

  • Added info dialog about required hardware - looks like a lot of people expect this app to work over USB cable, without even reading two sentences of app description. Well, I guess that the name can be misleading after all, so I hope that the new info dialog will help at least a bit. This message will be displayed only once.
  • Minor UI modifications - new toggle buttons, "inputstick.com" button, some changes in Settings screen (keyboard options are now spitted between custom and system keyboard).

Monday 29 September 2014

New API (September)

New API is now available here: download. Here's list of what's new:
  • more keyboard layouts:
French ("fr-FR"),
German ("de-DE"),
Norwegian ("nb-NO"),
Polish ("pl-PL"),
Portuguese (Brazilian) ("pt-BR"),
Russian ("ru-RU"),
Slovak ("sk-SK"),
Spanish ("es-ES"),
Swedish ("sv-SE"),
US/English ("en-US"),
US/English (Dvorak) ("en-DV"),
  • fixed problem with: "<", ">" and "|" characters missing from some layouts,
  • "deadkeys" are now properly supported

Monday 11 August 2014

New API

Latest InputStick API is now available here.

Previous API-related posts:

What's new in latest release of InputStickUtility (GooglePlay update will be available within next few hours):
  • Firmware upgrade to v0.93,
  • Reminds to update firmware, if new version is available.

Most important new features introduced in latest version of InputStick API:
  • fixed buffer-related problems (slow typing speed, missing characters), which could occur under some conditions,
  • supports new features introduced in latest firmware (v0.93),
  • OnEmptyBufferListener,
  • it is now possible to get error code and message,
  • Dialog, which will ask user to download InputStickUtility, if it is not installed,
  • available keyboard layouts: Dvorak (en-DV), English (en-US), German (de-DE), Polish (pl-PL), Portuguese (Brazilian) (pt-BR), Russian (ru-RU), Slovak (sk-SK),
  • new demo: TypeTextFile.

Although all API and firmware versions should be compatible with each other, it is recommended to upgrade to the latest available versions.

MainActivity of TypeTextFile  demo app, which shows most of new API features.

Monday 4 August 2014

InputStickUtility 1.1

New version of InputStickUtility will be available on GooglePlay in a few hours. Here's a list of what's new in this release:
  • Bug fixes,
  • UI modifications,
  • Firmware upgrade (v0.92),
  • Security options (AES-128 based encryption and authentication),
  • Status Bar notifications,
  • Change Log.
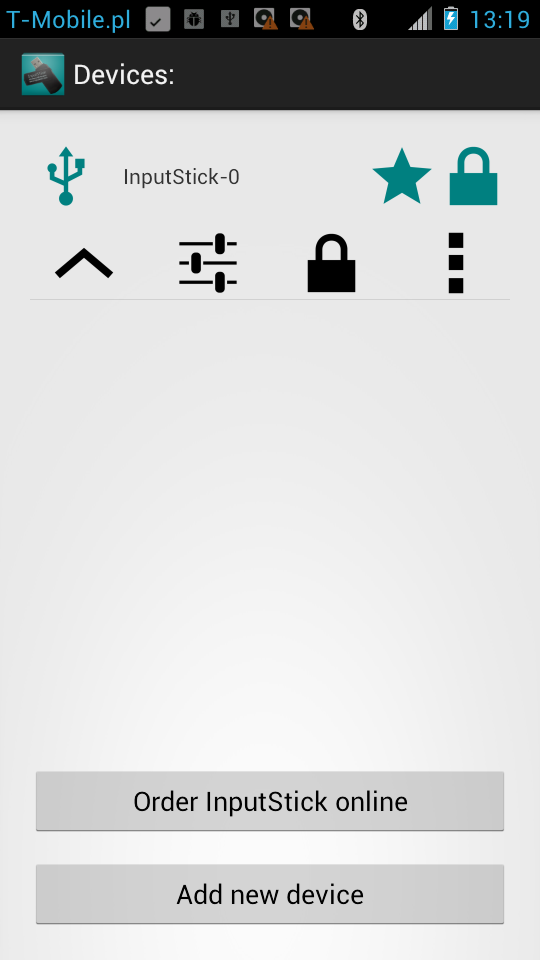
As you can see, now you can upgrade firmware of your InputStick to the latest version: 0.92, which (finally) provides most important security features: data encryption, password protection and allows to remove password protection if necessary (more on that later).


UI modifications.


Main list looks a bit different now.

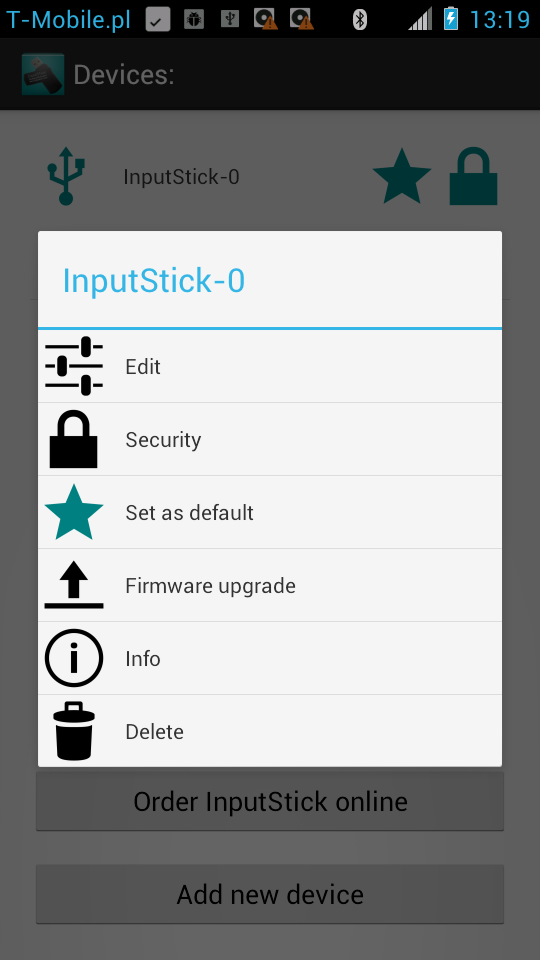
You can display full list of options after clicking on "More" button.

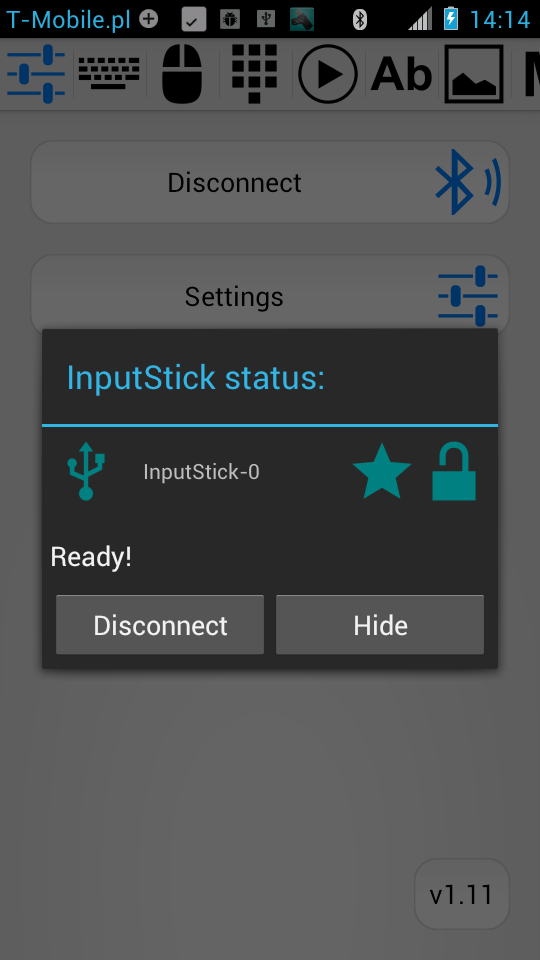
New status window, you can also see that now there are Status Bar notifications.

Firmware upgrade.


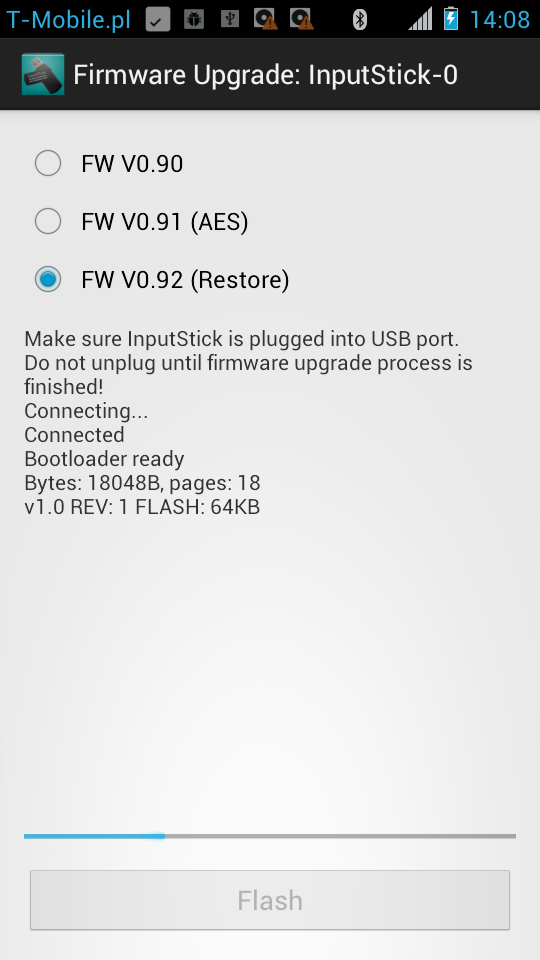
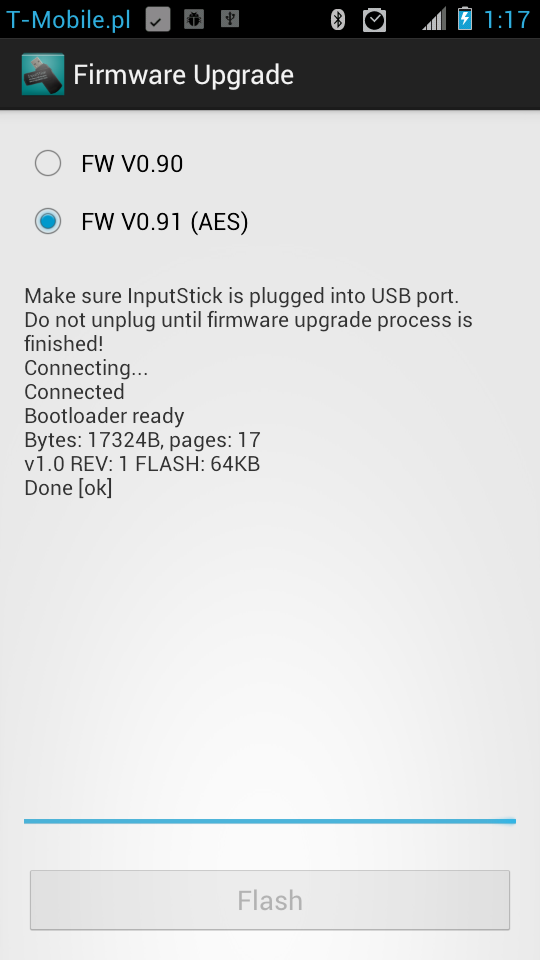
You can upgrade firmware of your InputStick to the most recent version: 0.92, which will allow to use password protection and encryption. The upgrade process is very simple and takes just a few seconds: make sure that InputStick is plugged into USB port, open Firmware Upgrade activity and press "Flash" button.


Security options.


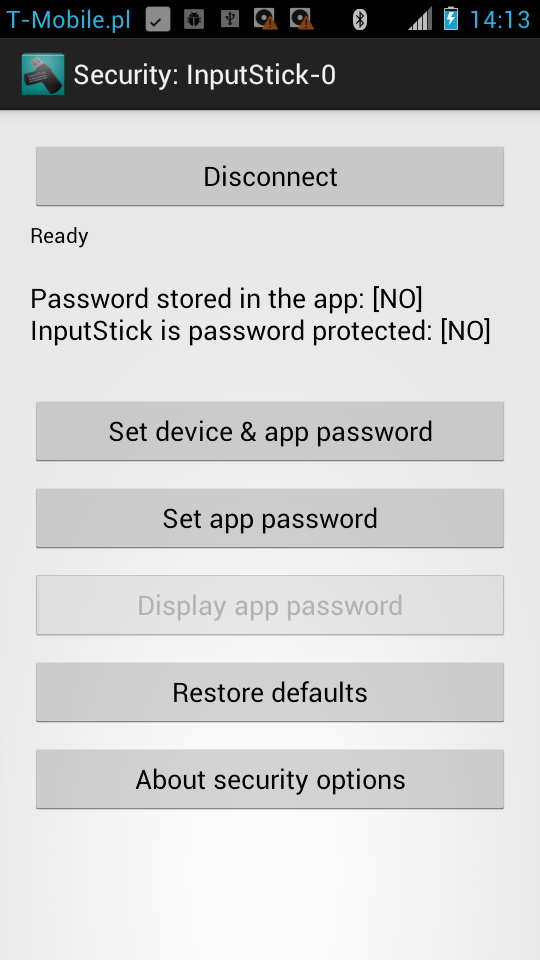
Let's take a look at security options now:


In most cases you'll need only "Set/Remove device & app password" button. When setting password, it is possible to also store plain text version, but it is recommended only if your Android device is already protected by lock screen pattern or similar mechanism. 

If you are using your InputStick with more than one Android device, you'll need to provide the same password for all of them. In this scenario you must use "Set app password" button. In such case having plain text version stored might come in handy: you can simply display your password using "Display app password" button.

Last but not least: there is always a possibility that you will forget the password, and it won't be possible to recover it because:
  • there is no plain text version stored,
  • you lost your smartphone,
  • application data was erased
In such case, the only way to remove password protection from InputStick is to restore it to factory defaults.

Restore defaults.


Restore procedure is a compromise between making it easy for the user to remove password protection when necessary and at the same time preventing other people form exploiting it. In order to successfully perform restore procedure following conditions must be met:
  • InputStick must be plugged into USB port,
  • you must have access to PC's keyboard,
  • you must be able to remove InputStick from the USB port,
  • restore procedure takes at least 10 minutes.
I assume that if someone can already physically access your PC and USB ports, then the possibility that he/she may remove password protection form your InputStick should be the least of you problems.


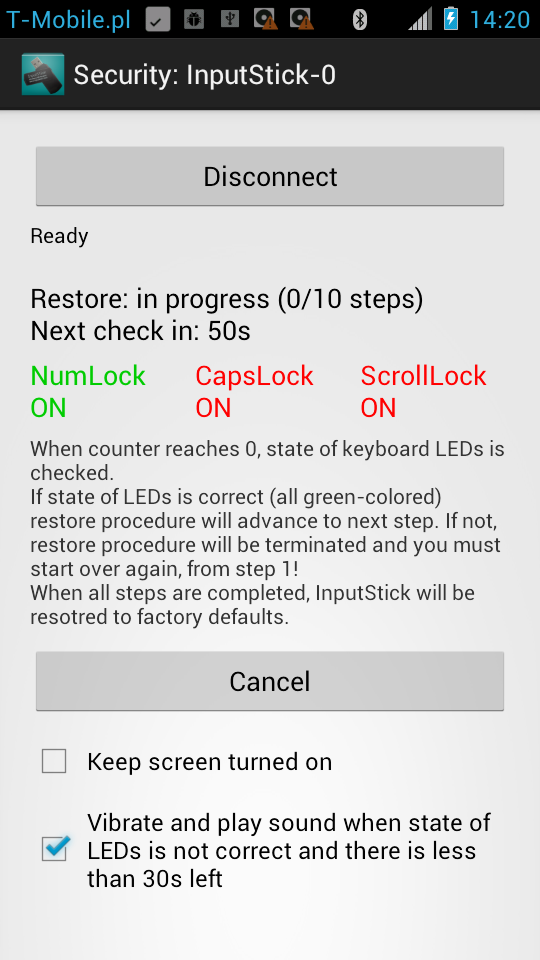
Once restore procedure is started, you'll be asked to set specific state of keyboard LEDs (NumLock, CapsLock and ScrollLock). Every 60 seconds the state of LEDs will be verified. If it is correct, the procedure will advance to next step. To make things clear, state of each LED is marked with green (correct state) or red color (you must toggle the LED):


After completing all 10 steps, password protection is removed. But it is not over yet! InputStick must be removed from USB port before you can use it again.

If state of LEDs is not correct during check event, restore procedure will be terminated and you must start over again!

Tuesday 22 July 2014

USB Remote v1.1

Update via GooglePlay should be available within next few hours.

What's new in v1.1?

- Macros
- Change Log
- Dvorak keyboard layout


It is now possible to create (record) and execute simple macros using USB Remote app. Just like it happened before with Media Remote and Barcode Scanner apps, instead of releasing separate app, the functionality has been added to USB Remote.

First, a few important remarks:
  • Because of Bluetooth latency timing won't be precise
  • There are no editing features in this release. It won't be possible to modify macro after recording.
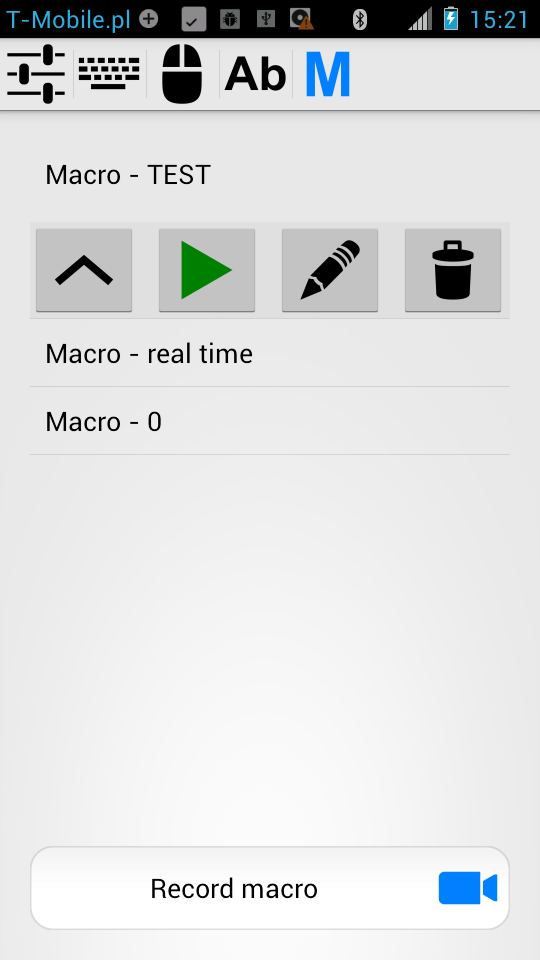
  • After running new version of USB Remote you should notice that new tab is visible: "M" macros. You can enable/disable this tab at any moment: Settings -> Choose visible tabs.


Here are definitions of basic concepts, just to keep things clear:

Macro - a set of actions, arranged in a specified order.

Action - there are following types of actions:

Keyboard - single USB keyboard report (state of keys at a given moment).
KeyPress - pressing given key, followed by its immediate release.
String -  typing given text.
Mouse -single USB mouse report (state of buttons, x,y and wheel displacement).
MouseClick - pressing and releasing given mouse button n-times.
Consumer - single USB consumer report (media buttons, volume control).
Delay - period of time to wait before executing next action.
Sync - wait until buffers of all interfaces (keyboard, mouse, consumer) are empty.

To better illustrate how sync action works:


Example: Macro - 1:

String: "type some text" -> Mouse: Left,0,0,0 (press LMB: left mouse button).

Since USB endpoints are independent and can be polled by USB host at any time, executing this macro will result in LMB being pressed at the same time key "t" is pressed.


Example: Macro - 2:

String: "type some text" -> Delay: 300ms -> Mouse: Left,0,0,0.

We can never be sure if 300ms is enough for USB host to receive all text, before LMB will be pressed.


Example: Macro - 3:

String: "type some text" -> Sync -> Mouse: Left,0,0,0.

Now we can be sure that LMB won't be pressed until all text is typed.


Example: Macro - 4:

String: "type some text", Sync, Delay: 100ms, Mouse: Left,0,0,0.

If USB host needs some time after text is typed (for example: to do spell checking or auto-save), it may be a good idea to add additional delay action. Otherwise it may happen that pressing mouse button will be ignored.

Creating a macro:


1. Recording settings:

Skip delay if shorter than - any delay shorter than current value, will be completely removed. Use this to remove unnecessary delays and perform actions as fast as possible. NOTE: sometimes it is necessary to put delay between actions, to give USB host enough time to process them. Use blue "Timing" button to manually insert delay/sync actions.

Reduce delay if it is longer than - any delay longer than this value will be reduced to match this value. This allows you to eliminate only long delays, while leaving shorter ones, which may be necessary to give USB host enough time to process keyboard and mouse input.

Automatically insert Sync - sync actions will be automatically inserted when different interface is used (example: moving mouse after typing text).

By default both values are set to 1s. This leaves only short delays (giving USB host enough time to process input) and eliminates long delays, which usually are unnecessary.

If both values are set to Never, all actions will be recorded in real time.

Setting can be modified when recording is in progress.


2. Start recording:

Go to "M" macros tab, click "Record macro" button. Start recording using red "Record" button. At any time you can pause recording (this will affect next delay action) and resume it by pressing "Record" button again.


3. Perform keyboard/mouse/consumer actions:

All keyboard/mouse/consumer actions performed using all other tabs will be recorded.

TIP: if you want to enter long text (for example: commands), use text field and "Type" button from "Ab" text tab. This will help to avoid missclicks and typing mistakes.

If you want to manually insert delay or sync action at a given moment, use blue "Timing" button.


4. Stop recording:

After recording all actions, go back to "M" macros tab and click on "Stop" button. You will be asked if you want to edit your macro now (change name).

Note: all delay and sync actions which are not followed by any other type of action will be removed. Example:
String: "type some text" -> Sync -> Delay: 100ms will be transformed into: String: "type some text".
Sync -> Delay: 100ms will result in empty macro (can't be saved)


Executing a macro:

To execute, select a macro and press "Play" button. At any moment you can cancel execution by pressing "Stop" button.


Youtube video:


In this video I demonstrate two very simple macros:

1. Run command prompt (Win + "cmd" + enter), type "exit" to close it.
Settings: skip delays shorter than 1s, reduce delay if longer than: 1s.

2. Run notepad (Win + "notepad" + enter), type "hello there".
Settings: skip all delays. Delays were added manually.


BTW: Next application that will get update is InputStickUtility. After that, GooglePlay version of Password manager will be available.

Saturday 12 July 2014

USB Remote v1.01

Yesterday I've released new version of USB Remote on GooglePlay. What's new?

v1.01:
- bug fixes,
- added Portuguese and Slovak keyboard layouts,
- user will be asked to download InputStickUtility if it is not installed,
- mouse can be also used from "Keyboard" tab (activated in settings). Can be laggy on older / low-end devices. May not be visible on low-res devices.


I hope that this dialog message will help to clarify that additional software (and hardware) is required. Basing on number of app installations, it looks like a lot of people not familiar with InputStick try to use this app (which in such case is of no use at all).


If your device's screen is big enough, you can now enable mouse support in "Keyboard' tab. The problem is that because the tab is already populated with a lot of UI elements, refresh rate is much slower than in "Mouse" tab. Depending on how powerful your hardware is, it may work relatively OK (Motorola Moto G, quad-core) or there will be noticeable lag (Motorola Razr, dual-core).

Also, if anyone wants me to add support for particular keyboard layout, please let me know by leaving a comment.

Wednesday 2 July 2014

Encryption - now available


I assume you are already familiar with my previous post.

First, some info about new firmware version: 0.91:
  • supports AES-128 (CBC mode) based data encryption,
  • can be password protected,
  • "Restore Defaults" functionality - erases all user settings (includes password protection).

Version 0.91 is not really "safe" yet. There are two "vulnerabilities" that I've left there intentionally:
  • "Restore Defaults" procedure works immediately. Normally it would take a while (more info here).
  • It is possible to access bootloader and replace firmware even without knowing password.
The reason for all of this is that password protection can permanently lock the device. Since this is a very first public release of firmware that supports the password protection mechanism, it is not possible to rule out that there may be some serious bugs (both in firmware and InputStickUtility app). I don't want anyone to be left with permanently locked device or to spend a lot of time going through restore procedure.

If there are no serious problems found, these "features" will be removed form next version.


Now, new InputStickUtility app:

New buttons (bottom row, starting from left) : Security, Firmware Upgrade, Info:


Security:

 
App password (key) is stored in InputStickUtility application. If you believe that your device is properly protected, you can consider to store the password also in plain text form.

Encryption key is stored in InputStick flash memory. If you will use the device with some other Android device, you'll have to provide its password. That is why it may be a good idea to store also the plain text version: it won't be used on a daily basis, so most people will probably forget it eventually.

Obviously, both passwords must match.

In case if you forget the password (and it is not stored in plain text form or the Android device got lost or destroyed) you can use "Restore Defaults" option. As mentioned before, in this version it will work immediately.

Security settings will be available only when firmware version of the device is at least 0.91.

Firmware Upgrade:

 
Here you can upgrade your device to new firmware version. It will erase all user settings (this includes encryption key) form the InputStick device.

Info:

Displays basic info about the device.


Select device activity:


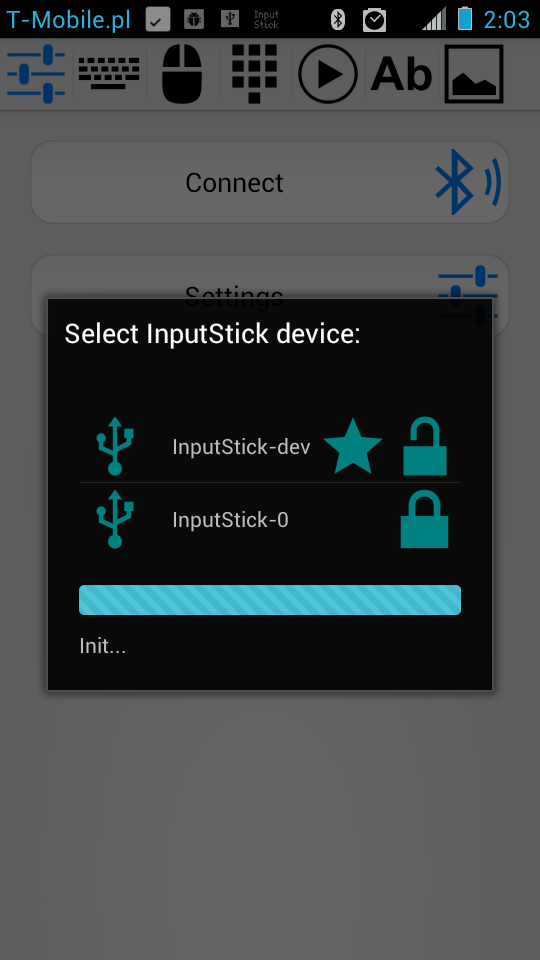
I also modified "Select device" activity a bit: now it won't disappear immediately after selecting device.


Thursday 26 June 2014

Encryption - almost ready

Here's a preview of new version of Utility app, which will (finally) introduce authentication and encryption. I know it should be ready long time ago, but I kept finding new things to add or fix all the time. At this moment everything seems to work fine, although I still need to make some minor UI improvements. I'll take 1-2 more days to check everything once again and after that I'll post download URL to .apk version. Some time later, if no serious problems are found, Google Play version will be updated.


User interface is slightly modified.


There is a firmware upgrade option. It will be necessary to go through this process to enable encryption.


Padlock icon indicates password protection status of a given device:
  • Grey - unknown.
  • Green, open - device is not password protected.
  • Green, locked - device is password protected, application knows valid password.
  • Red - there is a problem with password protection: no password was provided for the application or the password is invalid.


When new device is added, you will be asked to provide the password if it is already password protected.


You can set or remove password protection at any time. Also, you can choose to keep password in plain text form (if you believe that no one unauthorized will be able to access your Android device). It may be useful once you need to use the same InputStick device with other smartphone.

Wednesday 18 June 2014

Keepass2Android

Just a quick note. InputStick is now supported by Keepass2Android password manager. It requires installing and enabling InputStick plug-in. Just like with my apps, InputStickUtility is also necessary.

Saturday 17 May 2014

Google Play


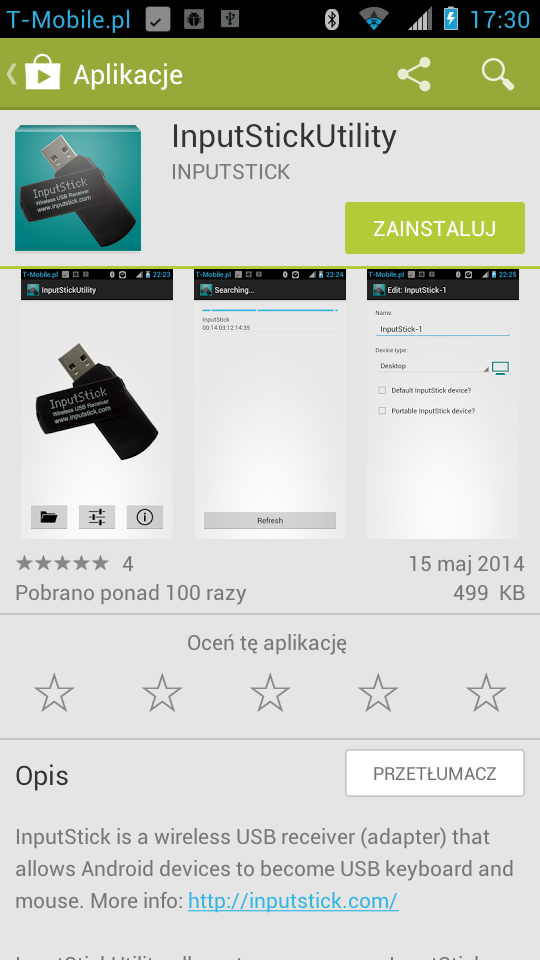
InputStickUtility and USB Remote apps are now available on Google Play. It is also possible to get .apk files from download page. I've updated InputStick API, now it includes support for keyboard layouts (currently: DE, PL, RU, EN/US), more info in my previous post.

Unfortunately, recently I was not able to get many software-related things done. I keep wasting A LOT of time on stupid things like dealing with customs office :(

Tuesday 29 April 2014

Keyboard layouts

Recently I've discovered a great tool: Microsoft Keyboard Layout Creator.


This allows me to easily support new keyboard layouts, even without knowing anything about given layout or language. So far I have implemented support for following layouts:
  • English (en-US),
  • Polish (pl-PL),
  • German (de-DE),
  • Russian (ru-RU).
Each KeyboardLayout subclass allows to:
  • type text using given layout: void type(String text);
  • get character associated with given key, based on current state of Caps Lock, Shift and right Alt keys: char getChar(int scanCode, boolean capsLock, boolean shift, boolean altGr);
It is important to remember about following limitations:
  • user make sure that USB host uses the same layout as the application. Application has no way of knowing what layout is currently used by USB host.
  • obviously, once you use a given layout, only characters defined for the layout are available, other characters will be ignored.
USB Remote already supports previously mentioned layouts. In case of some layouts it may be a good idea to change default placement of some of keys, but that would require a bit of experience with given layout.

German layout

Polish layout

Russian layout

I'll release this version soon, along with some other minor fixes and improvements. Also, please let me know if you would like me to add other layouts.


Friday 11 April 2014

USB Remote

USB Remote is now available on download page. There is also new version of Utility app ("Dialog" settings now works correctly). Text typing speed has also been significantly improved.

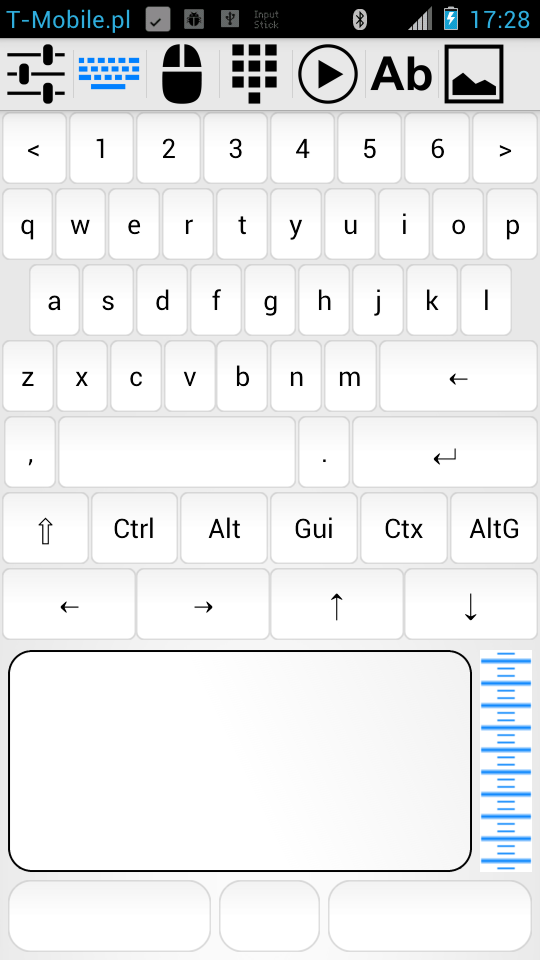
Remarks:
  • "Gui" - if you use Windows this is a "Win" key.
  • "Ctx" - context menu key.
  • "AltG" - right alt key.

Some features that will be available in next version:
  • sensitivity settings for mouse and scroll wheel.
  • scanning QR/barcodes (so it will temporarily replace BarcodeScanner app).
  • configuration for some of media buttons (at this moment: close = Alt + F4,  fullscreen = Alt + Enter).
  • ability to keep screen on all the time .
  • repeating key action, when key is pressed for a longer period of time (just like with real keyboard).
I think about making different layouts for my custom keyboard screen but this will require some major modifications, so I'll get back to it once I'm done with more important tasks.


EDIT:

New version (15.04.14) is now available (see download page). It includes all previously mentioned features and:
  • new "Presentation" tab: this will replace Presentation Remote app.
  • allows to scroll tab list and set which tabs should be visible (useful for low resolution devices).

Wednesday 9 April 2014

API & Demos


What's inside?
  • InputStickAPI - if you want to develop your own Android apps.
  • DemoBT - simple demo app (source included), uses direct Bluetooth connection.
  • DemoService - simple demo app (source included), uses background service from InputStickUtility.
  • InputStickUtility - utility app. Required by apps, which use background service to communicate with InputStick. Allows to manage your InputStick device(s), and upgrade firmware if necessary.
Tomorrow I should be ready with Remote Controller app. Other apps will be released gradually, during next few days. Once an app becomes available, I'll post project update on IGG campaign page.

You need to allow to install applications form unknown sources in order to install .apk files (System settings -> Security -> Unknown sources). Apps don't require any unnecessary privileges (Bluetooth / Vibrations). During the weekend I'll do some testing using different Android OS versions (2.3, 4.0, 4.4), if everything turns out OK, I'll publish the apps on Google Play.

If you want to use the API, take a look at Demo apps. They are as simple as possible, it should be relatively easy to get started. I'll need some time to prepare better examples and documentation.

Some important remarks:
  • Supports Android 2.3 and higher.
  • Direct Bluetooth connection: there is no need to install InputStickUtility, but your application must take care of providing Bluetooth MAC address (and encryption key, once encryption will be fully supported). You also must add Bluetooth-related privileges in your AndroidManifest.xml file.
  • Background Service - InputStickUtility takes care of establishing Bluetooth connection. It is necessary to install the app, and add your InputStick device to database.
  • Adding API: in Eclipse go to Project Properties -> Android -> (Library) Add -> Select InputStickAPI 
  • Bluetooth pairing PIN: 1234.

Tuesday 1 April 2014

All PCBs ready

Finally, all PCBs are ready:

Just a few...

Some more

Close-up
There are still some things left to do: configure BT modules, flash bootloader, firmware, and finally: put PCBs inside enclosures.

Monday 31 March 2014

Availability info

Hardware availability:

I've just heard from my manufacturer, all devices form the very first production batch will be ready tomorrow. I'll need one more day to come and pick them up, pre-load firmware and test each device. I think there will be no more hardware-related delays, first five devices that I received last week for testing are working just fine (more details).
  • Shipping Indiegogo.com pre-orders: 2nd April 2014. I'm really sorry for delaying this again. I tried to stick to my estimated March 2014 shipping date, but at the same time I wanted to be extra careful with manufacturing. After all one stupid mistake and I could end up with a few hundreds faulty PCBs / devices.
  • Everyone else who sent me an email regarding availability will be notified by email as soon as I'll be ready to take more orders.
  • I think that next week there should be an option to order InputStick online form www.inputstick.com

Firmware:

By default all devices will be flashed with "Basic" firmware version which offers you: keyboard, mouse and consumer control (volume, playback control etc.) USB interfaces.
  • So what about ability to emulate all different kinds of USB devices? This will be possible with "Advanced" firmware option, which will be available as a firmware update (via Bluetooth).
  • When it will be available? I want to release it by the end of April. Current "Advanced" firmware and API implementations works fine with all different kinds of USB HID class devices, but it requires some fixes / changes to allow to efficiently emulate other USB classes like for example: virtual comm port. Releasing currently available version now and updates few weeks later will just create a lot of mess. At the same time, basing on feedback from you I assume that vast majority of people will be happy with "Basic" firmware.
  • Why it is delayed? Because of many requests for API for other platforms I focused most on "Basic" firmware version (it already did some brief tests with Windows, Linux and Java2ME platforms). Also, I put a lot of effort into security (AES-128 encryption), access control and possibly safe way to restore default settings (remove password protection).
Some more details about why I decided to make two firmware options: Simplified firmware and API


API / Apps:
  • Android API,
  • Device Manager,
  • Remote Controller,
  • Barcode Scanner,
  • Password Manager,
  • Presentation Remote,

will be available as a direct download form www.inputstick.com on 6th April 2014. I think that first pre-ordered devices should arrive to Indiegogo backers starting from 7th of April.

If you want to know what to expect from the API take a look at Developers section (this is based on previous API version, but there won't be any significant changes).


Wednesday 26 March 2014

First machine assembled PCBs

Just another quick update:

Today I've received 5 completely assembled PCBs from my manufacturer for testing. Everything except USB connector is machine assembled. So far everything works fine. Rest of the boards should be ready on Monday.

Here are some photos, they would probably look way better in daylight, but that's more less 7 hours from now :)


Friday 21 March 2014

Quick update

Completing all components necessary to start production took me a little bit more time than I assumed. DHL can move a package from Shenzhen to Warsaw over a weekend, but then it takes three days to get it through customs office. Anyway, I've already delivered all components to my manufacturer and if there won't be any unexpected problems with assembly, devices should be ready on Tuesday/Wednesday next week. Then I have to test every single unit, upload firmware and generally double-check everything, so it looks like I'll be ready to send first devices on Monday, 31.03.2014. I'll keep you posted about further progress.