Tuesday 29 January 2013

Library: USBKeyboard example

In this post I will show how to use device classes from InputStick library. In this case you don't need to know any technical details about USB. I think that functionality offered by standard devices from library should be sufficient for 99% of applications. InputStick library still requires a lot of work, at this moment code is a bit of a mess so I guess there is no sense to go into too many details now. Implementation of some things may be changed any time soon. At this moment there are following device classes implemented:
  • USB Mouse
  • USB Keyboard
  • USB Gamepad

I will use USBKeyboard class as an example.
 
Any class that emulates USB device using InputStick library must inherit from USBDevice class, which takes care of managing communication with InputStick, queueing messages etc. There is also USBDeviceListener interface, which allows to receive incoming USB data and callbacks informing about change of connection state, using following methods:
  • public void onUSBData(byte[] data);
  • public void onUSBEvent(int code);

first method is called when data is received from USB host. In case of USB keyboard, this method will be called whenever state of NumLock, CapsLock, ScrollLock LEDs changes. Second one is called whenever connection state changes. Possible states are:
  • STATE_NONE - initial state (disconnected).
  • STATE_CONNECTING - establishing Bluetooth connection.
  • STATE_CONNECTED - Bluetooth connection established, configuration data can be now uploaded (library takes care of it).
  • STATE_READY - USB host set device state to "configured", now it can be used.

Now a quick overview of USBKeyboard class. Methods inherited from USBDevice:
  • public void setContext(Context context) - used to pass application context.
  • public void setMac(String mac) - sets Bluetooth MAC address of InputStick device (usually loaded from applications preferences).
  • public void connect() - initiates connection to InputStick.
  • public void disconnect() - disconnects from InputStick.
  • public int getState() - returns current state of connection.

methods specific to USBKeyboard:
  • public void type(byte modifier, byte key) - presses and releases key and modifier (Alt/Crtl/Shift/Win key).
  • public void type(String toType) - types content of passed String.
  • public boolean isCapsLockOn() - returns current state of CapsLock.
  • public boolean isNumLockOn() - returns current state of NumLock.
  • public static byte isKeyCode(char c) - translates char to HID key code (codes used by USB keyboard).
 
Here's an example showing how all this works in Android Activity class:
 

When Activity is created, init() must be called to pass all necessary parameters. When user clicks "Connect" button, library will try to establish Bluetooth connection (remember that application requires permission to use Bluetooth!) and configure InputStick device. Every time connection state changes it will be reported using onUSBEvent, which can be used to enable/disable parts of user interface (for example: "Type" button). When Activity needs to type some text, "type" method should be used (it will type text and press enter key). Finally, when user clicks "Disconnect" button, application will terminate current connection.


Tuesday 22 January 2013

Keyboard and mouse demos

Here's a short video showing InputStick used as a USB keyboard and USB mouse:


I know that quality is not great so I'm posting some screenshots here:
 
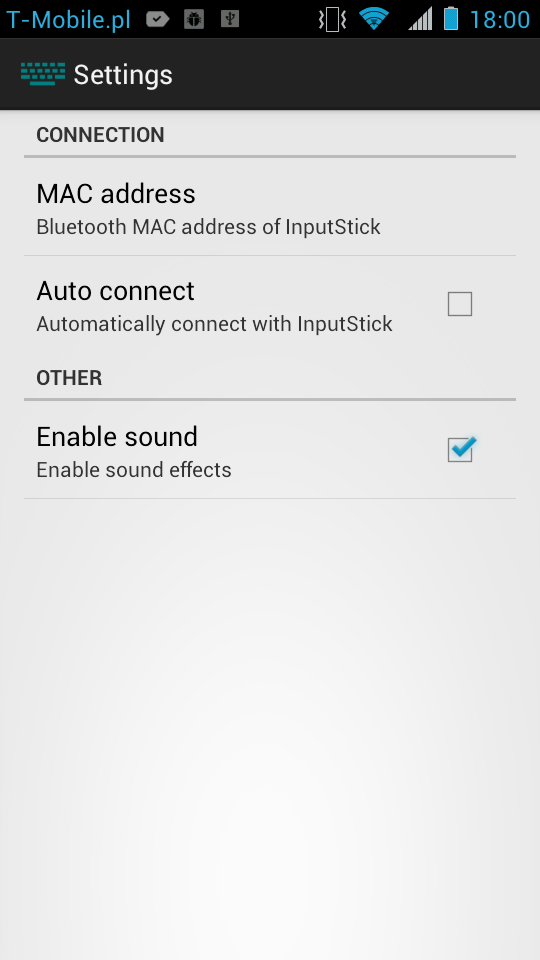
Settings Activity.
 
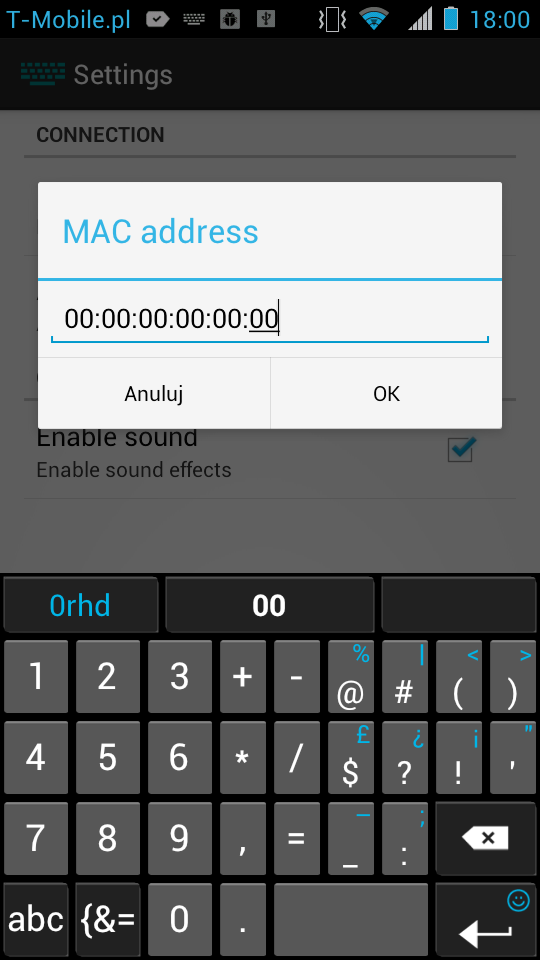
Enter Bluetooth MAC address.
 

In order to connect smartphone with a InputStick device it needs to know its Bluetooth MAC address. In demo applications it has to be entered manually, but Bluetooth device discovery might be implemented as well. In both cases whole configuration process shouldn't take more than 30 seconds and has to be done only once.
 
 
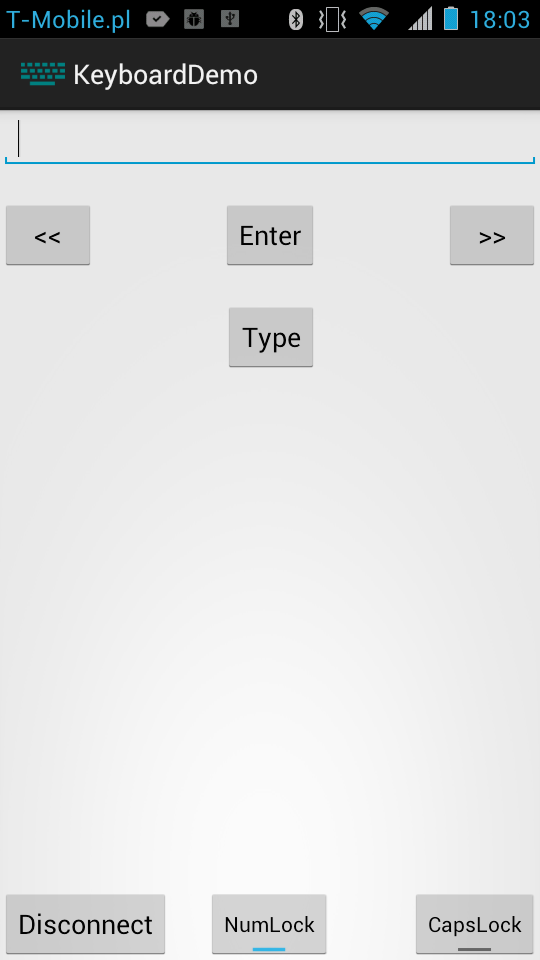
Keyboard Demo application, not connected yet.
 

Keyboard Demo application, connected with InputStick.
 
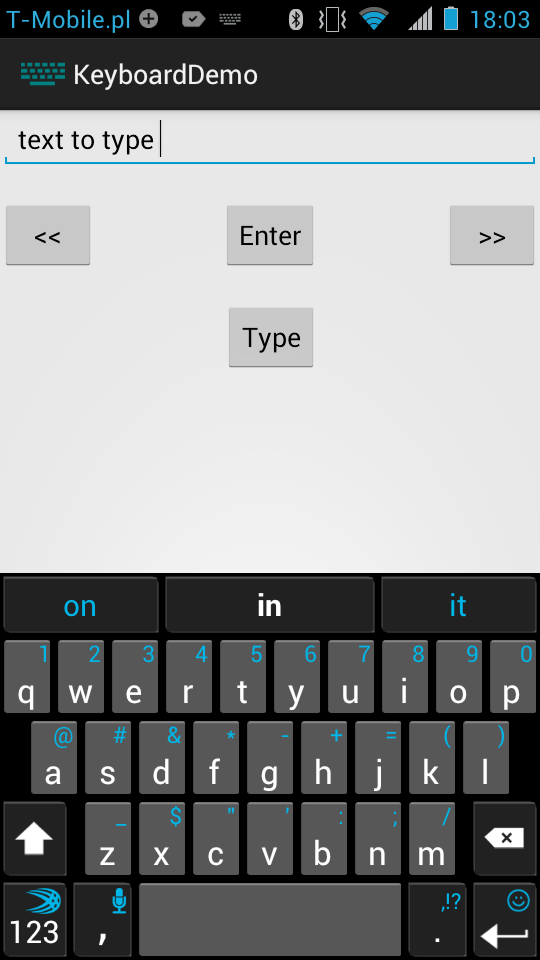
Type some text.

When "Type" button is pressed, application will use InputStick to type content of text field. "<<" and ">>" buttons are respectively mapped to Shift+Tab combination and Tab key, which allows to switch between different text fields (for example: switch from "user name" to "password" field, when logging in). "Enter" button obviously emulates pressing keyboard Enter key :) 


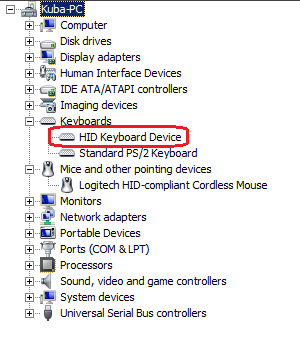
InputStick emulating USB keyboard.
 

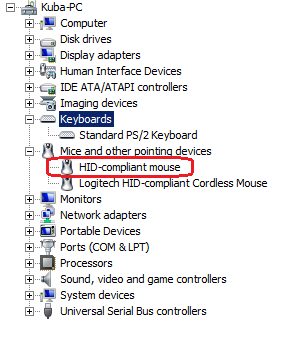
InputStick appears in Device Manager as a standard USB keyboard, so there are no special drivers required. Since OS thinks it is a physical keyboard, you can use IS to do anything that can be done with real one.
 
 
Mouse Demo application.
 
Here you can see main activity screen of Mouse Demo application. LMB and RMB stands for Left and Right mouse button, remaining empty area is used as a touchpad.
 
InputStick emulating USB mouse.
 
Just like in previous demo, OS thinks its a real USB mouse... because well, actually IT IS! So, that's it for now, in next few days I should prepare some more demo applications.

Monday 14 January 2013

Prototype assembly

Here are some photos I've made yesterday, while assembling InputStick prototype. Unfortunately I didn't make any while soldering components. Whole assembly process took about an hour.

On the bottom side there is a STM32F102 microcontroller, which takes care of handling USB protocol. If you take a closer look you'll notice, that uC pins are not perfectly aligned with footprint (probably worst example of my LQFP package soldering), still it works just fine.

InputStick: assembled PCB (bottom side)

On the top side there is a Bluetooth serial adapter module, which allows to wirelessly communicate with a smartphone. Since most pins of the module are not used, I didn't include them in footprint, what made PCB routing a little bit easier.

InputStick: assembled PCB (top side)

As you can see I had to cut PCB in order to fit it into enclosure. Since it's just 0.8 mm thick I was able to do that with scissors :) I also drilled four holes in top enclosure cover. Why? You'll see soon.

InputStick: enclosure

Now it's time to put everything together.


...and it's ready!

InputStick: bottom side

InputStick: top side

 
I guess that now it's clear why I needed holes in the enclosure. Since firmware still requires a lot of work, I often have to upload new version or work with debugger. To do that, I just need to plug four wires (SWDIO, SWCLK, RESET and GND) and connect it with ST-Link/STM32Discovery board, no need to remove PCB from enclosure. Whole process takes something like 30 seconds.

InputStick: with debugger cable attached

Now, let's upload firmware and make some tests. It works! :)

InputStick: plugged in


 Next time, I'll post videos of InputStick in action.

Wednesday 9 January 2013

Introduction

Hello everyone!

I've decided to start this blog to document process of developing InputStick. Have you ever wanted to make your smartphone a USB mouse, keyboard or maybe a gamepad? Now you can! And there is no need to install software or configure network.
 
First, let's start with some basic information. What exactly is the InputStick? Well, I guess that "Smartphone to USB Wireless Adapter" is most accurate description. InputStick is a small USB device, which together with smartphone (connected via Bluetooth), allows to emulate USB devices. InputStick takes care of handling USB protocol, while all logic and interaction with user is performed on a smartphone. Using Bluetooth as a communication link introduces latency and bandwidth limitations, so while keyboard can be emulated without any problems, don't expect much in case of mass storage class. At this time InputStick is able to work with Android/Java2ME devices.


Let's see how this really works:
  1. Plug InputStick into USB port. Nothing happens... for now.
  2. Start application. Application connects to InputStick and sends configuration data.
  3. System recognises new USB device (for example: USB keyboard).
  4. Application can now act as an USB keyboard: press and release keys.
  
Why would anyone want to use InputStick? Just a few examples:
  • Password Manager application - use your phone to type your user name and password for you.
  • Keyboard & mouse - control your PC, game console, smart TV.
  • Gamepad - use your phone as a gamepad.
  • Barcode scanner - use your phone as a barcode/QR code scanner (it can type scanned data!).
  • RS-232 - use your phone as a virtual COM port.
  • and many many more :)
Important thing is that InputStick is compatible with almost any USB host: PC (Windows, Linux, Mac), Android, game consoles, Smart TV etc. Of course, such host must be also able to work with device that is being emulated (every mentioned host will be able to work with USB keyboard, but don't expect Xbox 360 to make any use of USB thermometer).

How easy it is to add support for InputStick in Android application? If you want to implement emulation of a USB device all by yourself you need to have at least basic knowledge of how USB works (endpoints, descriptors, reports etc). If you just want to reuse already implemented device class (at this moment mouse/keyboard) it is as simple as:

additionally you may implement callback methods which will allow to receive  notifications about current state of connection and receive USB reports (in case of keyboard: NumLock, CapsLock, ScrollLock status).

So, that's the general idea. In the near future I will include more technical details. Please let me know what do you think about this project. Comments and suggestions are welcome :)